Showing posts with label Paleo. Show all posts

May 24, 2013

Grain-free Fried Green Tomatoes


The first time I heard of fried green tomatoes I had mixed feelings. I love fried things, but green tomatoes? They sounded like they could be bitter and gross. 

Not so! They are delicious! I had mine for breakfast (I think out of the box with my breakfasts since I gave up all boxed cereal), but it would be a great side dish for dinner with some meat as the main course and a light salad.

I make my fried green tomatoes with coconut flour, which is a great grain and gluten-free starch. I find the mild flavor of coconut flour lends itself well to frying. I love the coconut flour I get from Tropical Traditions. Coconut flour is my favorite grain-free flour substitute. 

Grains are common digestive irritants (even though most people don't realize this or know the signs) so I like to use coconut flour when I can as I am working on restoring my gut health due to some illnesses in the past. 

This recipe is suitable for most special diets including grain-free, gluten-free, dairy-free, primal and paleo diets.


Grain-free Fried Green Tomatoes

1/2 cup coconut flour
1/4 teaspoon salt
1/4 teaspoon pepper
1/4 teaspoon paprika, optional
1 egg, lightly beaten
1 large green tomato cut into 1/4 inch slices
2-4 tablespoons coconut oil, palm shortening, or nitrate-free bacon grease

Combine the first four ingredients in a shallow bowl. Dip the tomato slices in the beaten egg, then into the coconut flour mixture.

Heat a skillet for about 5 minutes over medium-high heat. Add the oil. Fry tomato slices till light brown, about 2 to 3 minutes on each side. Serve immediately.

Preparation time: 5 minutes. Cook time: 10 minutes. Servings: 3-4.

May 17, 2013

The Best Dairy-Free Chocolate Avocado Cream Pie with Whipped Coconut Cream!


Avocado in a chocolate pie??? 

Despite avocado’s relatively neutral flavor, for years it’s been relegated to the savory foods department. Avocado is typically used in guacamole and salads, or the occasional dip for variety. And with these kinds of limitations, it only makes it to the table once every few weeks. What a shame that this amazing nutrient dense fruit with so many health benefits is only eaten once a week at most, on Mexican night!

Now, I confess that initially I thought using avocado in sweet dishes was weird. As a kid a saw a recipe in an international cookbook for some kind of sweet avocado dessert from South America and I was like “gross”. But as an adult I’ve realized that some foods or food combinations I used to think were weird as a kid, are actually quite good if I just give them a chance. So when I started seeing recipes for avocado desserts around the internet I thought, I have to try this. And when I saw the chocolate pudding and pie recipes, I was like, What better way to begin my foray into avocado desserts but with chocolate? Ah…chocolate.

To read the rest of my post and view the recipe, please hope on over to Whole Lifestyle Nutrition!


Oh, and if you want to skip right to my simple and healthy crust recipe (made with palm shortening or butter), click here!

Apr 30, 2013

Ivorian Aloco {Fried Plantain and Palm Oil}


Delicious, caramelized fried ripe plantains were my favorite snack during my growing up years in the Cote d'Ivoire (Ivory Coast). Known as aloco in the the Cote d'Ivoire, this dish is usually eaten as a snack served on a piece of newspaper, or the evening meal alongside achekey (a couscous like dish made with grated fermented cassava, usually spelled attieke), pepper sauce, and fried fish. Somehow the combinations of these things is just amazing! The western palate, however, general prefers sweet plantain not mixed with savory fish and pepper. 

In Liberia this dish is usually referred to simply as "fried plantain", and in Ghana it's known as kelewele.  Plantain is a very popular food throughout West Africa, and African in general, as well  as many South American countries where the plantain, also know as the cooking banana, is readily available.


Plantains are prepared in a number of ways in West Africa, and are a nutritious part of the indigenous diet. They can be thinly sliced and fried green to make a chip very similar to potato chips (only better!), they are fried when the fruit is yellow and ripe, as is pictured above, which tastes more like soft French fries, or they can be fried when the plantain is black and appears to be rotten, as is done with aloco. In the Cote d'Ivoire plantain is also boiled then beaten in a mortar with boiled cassava to prepare futu, a delicious doughy starch served with meat gravy. Plantains are also served roasted when very ripe over low coals, which is another personal favorite.


When fried with a healthy oil, such as palm oil as is traditionally done, aloco can be a healthy side dish or snack. Aloco is an example of a modern day tribal food and is appropriate for paleo, primal, whole foods, and traditional foods diets. The basics to this recipe are plantain, oil, and salt, but some people add ginger, garlic, hot pepper, onions or a combination of these. My favorite is the ginger. 

Plantains are now available at most large supermarkets, as well as ethnic food stores. You can often find rich red palm oil at your local ethnic food store as well, or order it online at Tropical Traditions. Those who may not like the earthy taste of palm oil should now that it blends perfectly with the plantain and any strong taste is no longer noticeable.

Many people who grew up in West Africa crave aloco. But there are several tricks to getting that authentic taste. First of all, you want the fruit to be at the perfect stage of ripeness. Like the banana, as plantains ripen the starches are converted into sugar and the fruit gets more and more sweet. This is part of the secret to aloco. The plantains should be black with a few spots of yellow still visible.  If you notice some mold developing on the skin the fruit is getting too ripe and starting to spoil beneath the peal. (Though portions of it will probably still be okay to cook). Cooking them has to be done correctly as well. You want the pieces to be perfectly caramelized without falling apart or burning.

Aloco-perfect plantains. Mostly black with a touch of yellow still remaining.

Ivorian Aloco

3-4 Tablespoons palm oil or coconut oil (preferable unrefined for no coconut taste)
2 very, very ripe plantains, cut into 1/2 to 1 inch pieces (not sliced)
2-3 teaspoons finely chopped or grated ginger root, optional
1/4 teaspoon salt

In a heavy skillet, heat the oil over medium-low heat (number 4 on my stove) for about five minutes. Combine the remaining ingredients. Spoon the plantain evenly into the pan. Cook for about five minutes, then with a fork, carefully turn the pieces. Do not use a spatula or spoon as the pieces will be very fragile since they're so ripe. Cook for another 15 minutes, turning carefully at each five minute interval until the pieces are caramelized and dark brown. 

Remove from the pan with a slotted spoon and drain on a paper towel. Or don't drain if you aren't bothered by healthy oil!

Preparation time: 2 minutes. Cook time: 20 minutes. Servings: 2-3


After about 5 minutes of cooking.

Perfectly caramelized.

{This recipe is linked up at Tasty Traditions and Whole Foods Wednesday.}


 What ways have you found to incorporate plantains into a modern diet?

Mar 25, 2013

Liberian Greens And Rice


Stewed greens served over rice is one of the most common and well-known Liberian meals. It's also served in many other West African countries including the Cote 'd Ivoire (Ivory Coast), Guinea, and Sierra Leone. In Liberia all the toppings served over rice are referred to as "soup" and usually contain meat, onions, palm oil (refined or unrefined, depending on the recipe), and hot hot peppers. Clean sinuses and a sweating brow are common side effects to eating traditional Liberian food!

There are many kinds of greens used in these stews including sweet potato greens (Liberian "potato green soup"), collard greens, cassava (tapioca) greens, and several types of indigenous greens. The Liberian cabbage soup is also made with this same recipe.  


The Liberians who still live in villages (about 50% of the population), plus a fair number of those from urban areas, grow small patches of sweet potato greens, cassava/tapioca greens and sometimes collard greens and cabbage. Women and children can frequently be found in their gardens picking fresh produce to cook later that day. (You can read more about Liberian agriculture here). Wild greens that grow in the surrounding jungle are readily available and used for stewed greens as well as a number of medicinal preparations.


Produce is often transported to larger towns and sold in market places such as the one shown here. The large blue bucket with greens overflowing are for a meal, and the dried greens under the table are for  medicinal use. In the villages food and goods are most often transported by people traveling on foot and carrying sometimes incredible loads on their heads.


The greens are always shredded very finely for the meals. The cassava greens are actually pounded in a mortar with a pestle into a fine mealy texture. 


Here my friend Eveline is shredding potato greens. The greens are packet tightly into a bundle then shredded with a sharp knife very close to the hand. The skill these women have in shredding the greens by hand never ceases to amaze me. Little girls are taught to do this at an early age and I've never heard of anyone cutting themselves. 


A few notes about this recipe:

1. This is my recipe for Liberian greens. It is for collard greens with palm oil, but I used kale as it is more readily available and cheaper than collard greens, yet has the same flavor when cooked. But the recipe is very versatile and can be used with a number of dark leafy greens as well as cabbage. Spinach does not work with Liberian greens recipes as it is too tender and becomes mushy. Authentic Liberian cassava leaf and potato greens can sometimes be found in the frozen section of African food markets. The Liberian sweet potato is different than the American variety. Some people have found success using the American variety in Liberian potato greens soup, while others say it is just not the same.

2. Traditionally bone-in meat is used for all the Liberian stews. The flesh, skin and cartilage are all chewed off the bone and the marrow is even sucked out the ends. Though this seems gross to most Americans, this is crucial for receiving vital nutrients found in the bones for the Liberians to remain healthy. We'd do well to learn something from these tribal diets, though I've used chopped pieces of meat in my recipe as this is much easier to eat and more kid friendly.

3. I've used palm oil in the recipe as this is the most popular oil in this region of the world. I also wanted to offer a recipe to other Traditional and Paleo foods followers who are looking for ways to incorporate this nutritious oil into their diets. But I've given other oil options as some Liberian recipes use refined palm oil which does not have the distinct flavor of the unrefined palm oil. Refined coconut oil, lard or tallow would be healthy oil options, but for those who simply stumbled across this recipe for a Liberian greens recipe, canola oil or peanut oil may be used. Palm oil can be purchased online from Tropical Traditions, or you will probably be able to find some in your local ethnic food store. (My local hispanic food store carries palm oil.)

4. This recipe is paleo approved. It can be eaten without rice for those who are avoiding all grains, but naturally it is going to be best and most authentic served over rice. For grain-free diets I suggest trying the greens on cauliflower "rice".

5. Weigh the greens at the grocery store to make sure you purchase enough. You will need way more than you think you need as they shrink down so tiny! Shredded, one pound will probably be at least 16 cups.

6. Plan ahead as this recipe is fairly time consuming due to all the preparation of the greens as well as cutting the meat into pieces. But the greens can be cut in advance, up to two days, and the completed recipe freezes very well.

7. Dark leafy greens are actually more nutritious when cooked. The Liberians simmer their greens for over an hour sometimes! My recipe only needs about 20 minutes, but for those who are worried that you'll be killing all the nutrients, don't worry - you'll actually be making a number of them more available. (For example, some vitamin C is lost during cooking, but way more calcium is available after cooking).


Liberian Greens and Rice


Ingredients:


1 to 1 1/2 pounds hearty dark greens such as collard greens, kale, or even cabbage. I've used beat tops and also suggest trying turnip and mustard greens. (You will shred these, instructions below).
1 large onion, finely sliced
3 cloves of garlic, minced
1 pound uncooked meat, such as beef, chicken, lamb or pork, cut into 1-inch cubes
1 teaspoon seasoned salt or regular salt
2 tablespoons traditional fat like palm oil, bacon grease, lard, tallow, refined coconut oil, (canola oil or peanut oil may be used*)
1 tablespoon fish sauce, worchestishire sauce, or even 2 tsps anchovy paste**
2 tablespoons liquid aminos (coconut aminos are paleo) or 1 large bullion cube (preferable MSG-free). Salt can be used if you don't have or choose not to use either of these. I would start with 1 teaspoon and work my way up.
1/3 cup palm oil or refined coconut oil, lard, tallow, canola oil, or peanut oil*
3 tablespoons tomato paste
1/2-1 teaspoon chipotle pepper powder, cayenne pepper, or 1 minced habanero pepper, seeds removed, optional
a few drops of liquid smoke, optional

Short grain brown rice, or rice of choice for serving, at least 1 1/2 cups cooked rice per person.

*Canola and peanut oils are not healthy oils but are fine to use if you have just come here for the Liberian recipe and don't have any of the other suggested oils.

**In Liberia this very subtle (and not fishy at all) flavor would be achieved by the addition of several small dehydrated fish.

Prepare the greens:


Begin by washing and shredding the greens. Rinse of the greens with cool water to remove any sand or soil. Pat dry with a clean towel. For larger greens like kale remove the thick woody stems. Stack the leaves together then roll up into a fist-sized bundle and slice with a very sharp knife as small as possible. I aim for 1/4 inch, but even that is hard to achieve (most slices end up being thicker). Before my food processor met an untimely death I was able to shred them with the shredding blade (not the chopping blade in the many compartment of the machine), but I was not able to shred them with my Kitchen Aid's shredding attachment. The more finely they are shredded the more authentic - and digestible - they will be.

Pile the shredded greens into a very large bowl. Once they are all shredded run clean water into the bowl and swish the greens around to remove any bits of soil that may have remained. The sand should have settled to the bottom of the bowl so you'll want to lift the shredded greens out by the fistful and place in another large bowl. If there was a lot of sand on the bottom of the bowl you'll want to repeat this process once. Do not shake out the greens as the water left in them is just the amount of water you will need to add to the sauce. (There should be about 2 cups water that cling to the greens).

Slice the onion and mince the garlic and place on top of your pile of greens. Now that the greens are ready, you can proceed with cooking the meat.

Cook the recipe:

Turn the heat to medium and melt two tablespoons oil in the bottom of a large pot. Add the meat and sprinkle with seasoned salt. Cook, stirring occasionally until the meat is cooked through and starting to brown. Remove from the pot and keep warm in a bowl.

Dump the bowl of greens (and onions and garlic) into the oil in the bottom of your hot pan. You may need to do it in two batches after the first batch wilts a bit. Put a lid on the pot and stir every few minutes to mix the greens down and make sure they cook evenly.

Stir in the remaining ingrediants. Once smooth and incorporated taste to see if it needs more salt. Add the meat and reduce the heat to low. Simmer for about 20 minutes or until the greens turn very dark green.

Serve over hot short grain brown rice to be the most authentic, or the rice of your choosing.

Preparation time: 1 hour. Cook time: 40 minutes. Servings: about 6.


Click here to view my other Liberian recipes, and stay tuned as 
I continue to post more delicious West African recipes!


Mar 7, 2013

Strawberry Bunny Milk Real-food-ified


Who remembers drinking Nestle's Strawberry Milk as a kid? I LOVED that stuff. Of course, in Africa it was a VERY special treat and we could only get it at the supermarkets when we traveled to the big cities. We always called it "Bunny Milk" and there was no end to the lactating rabbit jokes and subsequent snickering as my siblings and I stirred the artificial ingredient laden syrup into our glasses of milk. 

I revisited this childhood memory food the other day as I created a healthy, real-food version of this delicious milk using some of the first strawberries of the season. 

Though typically a children's drink, this strawberry milk appeals to all ages and is a very nutritious guilt-free snack! Plus this treat can be dairy-free and paleo by using coconut or almond milk.


Strawberry Bunny Milk Real-food-ified

8-10 medium strawberries, hulled and coarsely chopped, about 3/4 cup
2 cups milk of choice (dairy milk, coconut milk, almond milk - I used raw milk)
1/4 teaspoon vanilla extract
1 Tablespoon honey or real maple syrup, or about 4 packets of stevia

If desired, warm milk gently over the stove just until hot. 

In a blender combine the strawberries and one cup of milk. Blend on high until no strawberry chunks remain, about 1-2 minutes. Add remaining one cup of milk, vanilla extract and sweetener. Blend until combined.

Let the milk sit for about a minute to allow the seeds to settle to the bottom of the blender. Poor milk into glasses taking care to leave the strawberry seeds in the bottom of the blender. Enjoy!


Prepartion time: 5 minutes. Cook time: 2 minutes (optional). Servings: 2.

{This recipe is linked up at Tasty Traditions, Whole Foods WednesdaySimple Lives Thursday, and Gluten-Free Friday.}

What's your favorite childhood treat?

Mar 2, 2013

Wilted Kale and Bacon Salad


I love to make big brunches on Saturday morning. This morning we enjoyed cinnamon rolls, farm-fresh eggs, strawberries, and this delicious salad from Whole Lifestyle Nutrition. Everything turned out great and my husband said the salad tasted pretty good for something green :-). I found the salad tasted good mixed in with my over-easy runny eggs.

Speaking of Whole Lifestyle Nutrition, I am excited to share that I have been accepted as a monthly contributor! I'm thrilled to be a part of the WLN team and to learn and grow through this experience. I'll let you know when my first post is published in a few weeks here.

Kale is a very popular vegetable right now and is being consumed in a myriad of ways, from green smoothies, to steamed side dishes. This is overall a good thing, as kale is quite nutritious. What you might not know is that kale is one of the vegetables that is more nutritious when cooked. Yes, not every veggie out there is healthiest raw. Nourishing Traditions talks about this and it didn't come as a surprise to me as traditionally these tough dark greens were not eaten raw. For example, in West Africa all of the dark leafy greens are eaten cooked.

I personally don't digest raw kale too well (right away I feel fine, but after a few hours my digestive system starts protesting), so there's not much of a temptation for me to eat it raw. So I jumped at this recipe when I saw that it was wilted. 

This salad (obviously) calls for bacon, a very misunderstood yet still beloved meat. Bacon is not bad for you (especially naturally cured bacon from free range pigs), it's what's added to it that is. Always choose naturally cured bacon that is free of nitrates, if at all possible.


The only thing I changed from Halle's recipe is that I doubled the bacon... because I could. :-D.


What's your favorite wilted or cooked kale recipe? I would love some more ideas as kale is in season and we've been getting it in our local farm box orders.

Jan 31, 2013

Grain-Free Strawberries 'n Cream Porridge

I have determined that if you have to go gluten-free, grain-free, or paleo, using coconut flour is the way to go. Of course, that's easy for me to say because I love anything that comes from the coconut. You're out of luck if you don't like coconut :-).


Coconut flour is cheaper per pound than the gluten-free grain that I've found, and way cheaper than almond meal. Plus you also use less, so a pound of coconut flour goes even farther than grain flour. I get mine from Tropical Traditions. Wait till they're having a sale or free shipping to get the best deal.

Since I am trying to do my very best to only eat grains that have been properly prepared (to improve digestion and neutralize any nutrient blockers) by either soaking or souring with my sourdough starter, coconut flour comes in handy when I haven't planned well. I also really like the flavor and texture, so sometimes choose to make something with coconut four instead of a grain.  I came up with this recipe the other day and thought I'd share it with y'all since it's so easy. 


And pretty.

I had lots of fun taking the pictures.

Another cool thing about this recipe as that it can be dairy-free. People who have intolerances and think they "can't eat anything fun" anymore should think again!

Grain-Free Strawberries 'n Cream Porridge

1 1/2 cups milk of choice (dairy milk, coconut milk or almond milk)
6 Tablespoons coconut flour
2 eggs
1/8 teaspoon salt
1 Tablespoon pure maple syrup or honey
1 Tablespoon coconut oil or butter
1/2 - 2/3 cup chopped strawberries (about 4 or 5 medium berries)

In a small saucepan whisk together the first 6 ingredients. Bring to a boil over medium heat, stirring constantly. Boil and stir about 3 minutes until thick and creamy. Stir in strawberries. Serve warm.


Preparation time: 4 minutes. Cook time: 5 minutes. Servings: 2.

Search terms:
strawberries and cream no oatmeal 
dairy-free, grain-free, gluten-free, nut-free breakfast

Jan 23, 2013

Any Day Coconut Curry


We love curry in our house. Thai curry to be specific. Thai curry is typically more mild than your average Indian curry. By mild I don't necessarily mean it has less heat, but the spices are less powerful. Coconut milk is used as the liquid which also serves to mellow out the curry a bit. My favorite versions are usually lightly sweetened. If you have only ever tried Indian curry and you think you don't like curry, I encourage you to try this recipe. Start out with less curry powder if you are new to the curry realm.

Curry powder is just a name for a blend of spices that is typically used in South Asia. There are various blends of curry powders, but to the undiscerning Western palate, they all work great in this dish. In Thai cuisine there is green curry (made with green chilies), red curry (made with red chilies) and yellow curry (made with turmeric). Most curry powders get their bright yellow hue from tumeric. My recipe here would be considered a yellow curry.

Thai coconut curry is a good example of a traditional food that is very nutritious. I am glad it is becoming more popular in the United States. Though my version my not necessarily be authentic, the spirit if the dish remains the same and the meat, curry, coconut milk, and veggies offer many nutritional benefits.


A few notes about the recipe:

Because most curry recipes call for unusual or hard-to-find ingredients I have spent some time working on this recipe to achieve a sauce that tastes very close to something you'd find at a restaurant, but uses every-day ingrediants. I've also including many meat and veggie options so no matter what you have on hand any day of the week,  you should be able to make this sauce. Because of the versatility of this dish, however, the recipe may seem a bit confusing. I tried to explain everything as clearly as possible, but I do suggest you read through everything a couple times before making the meal.

What kind of curry powder you use does not matter. The cheapest option available at your grocery store will work fine.

Curry is usually served over rice. I love it over brown Jasmine rice personally. I have also eaten it over lightly steamed Normandy blend frozen vegetables when trying to lose weight. Eating it over veggies would also work well for someone on a grain-free or Paleo diet.


Any Day Coconut Curry


Step 1. Marinate meat.
Step 2. Saute veggies and cooked meat, if using
Step 3. Saute marinated meat.
Step 4. Heat and combine curry paste.
Step 5. Mix everything back together, adding sauce ingredients.

Step 1. Marinate meat.
2 boneless, skinless chicken breasts, or approximately 1 1/2 - 2 cups chopped raw chicken, or about 1 lb thinly sliced beef or meat of your choice
1 teaspoon curry powder
1/2 teaspoon ground cumin
1/2 teaspoon ginger, ground, or freshly grated
1 clove garlic, minced
1/2 teaspoon salt
2 Tablespoons lemon or lime juice
1 Tablespoon corn starch or arrowroot starch, optional. (This will make the sauce thicker later. You can also use about 1 Tablespoon coconut flour, but add this later in the recipe.)

Mix all ingredients together in a container with a cover and allow to marinated in the refrigerator for at least 3 hours or overnight.

(I usually make a big batch of this meat and marinade when boneless-skinlesss chicken breasts are on sale. I divide the chicken into meal-sized ziplocks and put them in the freezer to use at my conveinince. This saves a lot of time and makes for a quick and delicious supper later on.)

For already cooked met use 1 1/2 to 2 cups cooked chicken, beef, or meat of choice, or 1/2 to 1 pound smoked sausage. Skip the marinating part.

Step 2. Saute veggies.

Veggies:
1 Tablespoon coconut oil or butter
1 medium onion, thinly sliced
1 - 2 cups sliced or coarsely chopped vegetables such as bell peppers (I usually use one bell pepper), zucchini or summer squash, eggplant, or thinly sliced carrots. I have even used frozen green beans and shredded kale stirred in later on.

In a medium skillet melt the coconut oil or butter and saute veggies until crisp-tender, about 5 minutes. If using cooked meat you can add it at this time.

If using marinated meat, remove the veggies and keep warm in a covered bowl. If using cooked meat proceed to step 4.

Step 3: Saute marinated meat.

In the same skillet, melt 1 tablespoon coconut oil or butter. Add the marinated meat and saute over medium to medium high heat until cooked through, about 10 minutes. Some of the meat juices may stick to the bottom of the pan, but don't worry about it. These will be lifted after you mix in the coconut milk.

Step 4. Make homemade curry paste.
In a small saucepan combine the following ingredients and heat just till it boils, stirring constantly.
Photo credit.

2 Tablespoons coconut oil or butter
2-3 teaspoons curry powder (start out with the lesser amount if you are new to curry or don't like your spices quite as strong)
1 teaspoon ginger powder or grated fresh ginger
2 cloves garlic, minced
1/4 teaspoon hot pepper powder, optional, (I love chipotle) if you like more heat.

Step 5. Mix everything together adding sauce.

Sauce:
1 can coconut milk
3/4 teaspoon salt
1 tablespoon whole cane sugar, regular sugar, real maple syrup or 2 packets (2 tsp) stevia

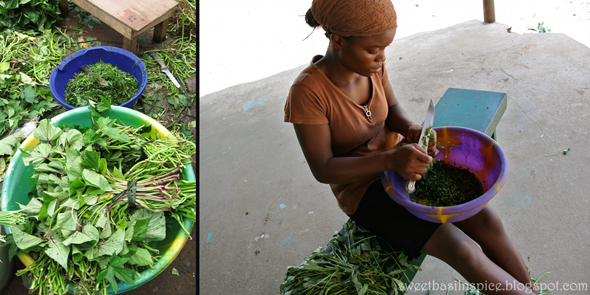
1/4 cup finely chopped basil, if desired.

Stir coconut milk into your skillet with the meat. Add the salt, sweetener, and homemade curry paste. Stir over medium heat until well combined and beginning to boil, scraping bottom to lift off any meat particles that may have stuck. Add the veggies and the basil, if using (adds great Thai flavor!). Serve right away as the heat of the sauce will continue to cook the veggies until they are very limp, which you don't want!

Serve over brown Jasmine or Basmati rice, steamed Normandy blend vegetables (for a low carb or paleo option), or rice of your choice.

Preparation and cook time: 20 minutes to prepare and marinate meat, about 25 minutes to assemble and cook the recipe. Serves: about 4.


Dec 21, 2012

Paleo Banana Muffins

Who knew grain-friee (and thus gluten-free) and dairy-free banana muffins could taste so great! These EASY paleo-diet-approved banana muffins are made with coconut flour and coconut oil. I've been on a healthy muffin kick for months now and have the perfect banana muffin recipe down pat, with many variations. For my non-paleo (a.k.a more normal ingredient)  whole-grain healthy muffin recipe, click here.


The Nourishing Traditions/Weston A. Price diet is all about eating foods our ancestors would have eaten. The Paleo diet is similar to this in its premise, but most Paleo adherents also avoid dairy, grains and beans. Before you think about how strange and restrictive this diet would be, take a moment to remember all the people you've heard of who can't have dairy or gluten, or who have other unexplained illnesses they are trying to correct nutritionally. While my family does not have any special sensitivities, I have learned that for babies and toddlers, the healthiest diet is one similar to Paleo. 

In my research to find the very best diet for my baby, I came across the book Super Nutrition for Babies: The Right Way to Feed Your Baby for Optimal Health. It is like the Nourishing Traditions book but for babies and children. Honestly it is the best nutrition book I've read to date (it's more readable than Nourishing Traditions), and has greatly influenced the way I feed my son and how I plan to feed my kids as I raise them. 

Super Nutrition for Babies explains that babies under one year should not eat grains (more on this later), and until two years of age should not eat grains containing gluten. Because of this I purchased some coconut flour to try making some healthy breads I can feed my little guy. (I purchased my coconut flour from Tropical Traditions. If you wait until they have a free shipping special, this is the cheapest place to buy coconut flour. Sign up for their newsletter to be informed of their ongoing sales and specials.)

I researched recipes using coconut flour, or grain-free Paleo recipes, and found many to be rather complicated, calling for a lot of ingredients. One banana muffin recipe even had you divide eggs, whip half the whites, fold them back into the batter, etc, etc. Yeah... Not gonna happen in my kitchen. Especially if I'm trying to make a quick snack for my kid. So I experimented and came up with this simple recipe for banana muffins that are surprisingly good. You really can't even tell it's coconut flour! 


Paleo Banana Muffins

2 mashed ripe bananas - brown spotted, or 3 completely black bananas*
1/3 cup coconut oil or ghee
3 eggs
2-4 tablespoons whole cane sugar, real maple syrup, or honey*
1 teaspoon vanilla extract, optional
1/2 cup coconut flour
1/2 teaspoon baking soda
1/2 teaspoon nutmeg
1/4 teaspoon salt

Preheat the oven to 350 degrees.

Combine the first 5 ingrediants until well blended. Stir in the remaining 4 ingredients until smooth. Prepare paper muffin liners, or use coconut oil to grease approximately 10 muffin holes. Divide batter evenly among the ten muffin liners. They should be about half full. You may fill 11 or 12 if the bananas are extra large. 

Bake at 350 degrees for about 23-25 minutes or until the tops are golden brown. I found coconut flour needs to be baked a bit longer than regular flour, and at a lower temperature. 

*Use less natural sweetener if you are using 3 black bananas. The sweetener can probably be omitted completely if you are trying to avoid all sweeteners. If you are using the lesser amount of sweetener, or none at all, the muffins will not get as brown as those in the photo when they are done. Just take them out after 25 minutes.

Preparation time: 10 minutes. Bake time: 25 minutes. Servings: 10 muffins.

{This recipe is linked at: Fight Back Friday, Gluten-Free Friday, and Fat Tuesday.}


This recipe was featured on Gluten Free Fridays!


I am an Amazon affiliate which means if you purchase the books I've linked (or anything on Amazon) after clicking through my site I will get a very small percentage of the profit (4%). I am also an affiliate with the handful of nutrition based ads you see on the right-hand side bar. Every dollar I make through this blog helps my family get closer to our goal of being debt-free.

Dec 7, 2012

Fall Butternut Squash Bake


These days I am all about one-dish meals. With a very active ten-month-old I am finding it quite difficult  to get a whole lot done in the kitchen! (Hence the sporadic blogging.) And, since it's fall, I'm loving making recipes that use fruits and vegetables available this time of year. Nourishing Traditions encourages the consumption of seasonal produce to take advantage of the varied fruits and vegetables and subsequent nutrients that come with these natural cycles. Due to our modern farming and transportation  abilities a variety of produce is available year-round, but i's best to try to base your meals on what is seasonal. God created these cycles for a reason. I believe the healthiest way to eat is by consuming food in the closest form to how God made it, which applies to the seasons as well. Plus seasonal stuff is typically cheaper and more rich in nutrients because it doesn't need extra help to grow during a time that it wouldn't naturally be growing on its own.


I got the idea for a butternut squash bake from a recent Taste of Home issue. I started out with the basic idea for a sausage and squash one-dish meal, and have tweaked and adjusted the recipe until I feel it's just about perfect! I brought it to a recent potluck where it was a big hit!

A few notes about the recipe:

This recipe is very flexible. Because butternut squash varies a lot in size, I have varied the amount of the ingrediants. The first number listed is for the lesser amount of squash. But you really can't ruin this recipe. Add and adjust the spices according to preference!

Butternut squash is the easiest to peal ("Easiest," ha! I hate pealing winter squash!), but acorn squash also works in this recipe. I would experiment with whatever kind of winter squash you have available.

This recipe can be paleo diet approved by omitting the cheese.

We usually eat this meal as a one-dish supper, but it would also be great, and go farther, with a light salad and some homemade bread. 

Feta cheese has the best flavor for this dish, but other kinds of cheese work fine too. Feta is saltier so keep that in mind before you you add any additional salt. Cheddar or mozzarella are good because they sort of bind the ingredients together and provide a delightful chewy texture.

The smaller squash with no sides would serve about 4, the larger amount with sides would probably serve 8-10.

I made this for a potluck recently. I baked it the day before, then put it in a crock pot in the fridge. To reheat I set the crock pot on "warm" and after a few hours it was piping hot and ready to serve. It tasted like it had just come out of the oven, but without tons of work that morning.

Fall Butternut Squash Bake

1/2 to 1 lb homemade turkey sausage, bulk turkey sausage, or bulk pork sausage*
1 large butternut squash, about 3 to 4 1/4 pounds, peeled, seeded and chopped in 1/2 to 1 inch pieces, or about 3 small ones (tip: weigh the squash at the grocery store in the scales at the produce section)
2-3 green apples, cored and chopped in 1/2 inch pieces (not peeled)
1 medium or large onion, chopped
1 to 2 cups cheese such as feta, shredded cheddar or mozzarella, optional
2 to 3 tablespoons melted coconut oil or extra virgin olive oil
2 to 3 tablespoons pure maple syrup, optional
1 1/4 teaspoons salt, plus more to taste with more squash
1/2 teaspoon pepper
1-2 teaspoon dried rosemary**
1 teaspoon fennel, optional (omit if using a sausage that already includes fennel)
1/4 - 1/2 teaspoon nutmeg
1/4 teaspoon chipotle chille powder, optional (omit if using hot sausage)

Brown the sausage over medium heat. Set aside.

Peel the squash and remove the seeds and membranes. Chop into 1/2 to 1 inch pieces. Place in a large mixing bowl. And the chopped apples, onions and cheese and browned sausage and stir to combine.

Preheat the oven to 400 degrees.

Drizzle the oil and maple syrup over the squash mixture. Sprinkle the salt, pepper, and remaining spices over the squash mixture. Toss to coat evenly.

Spread the squash mixture on several baking sheets (with 1 inch lip), 9x13 inch pans, or for a lager quantity, 15x11 inch pans. Use enough pans so there's only one or two layers of squash. (This allows the moisture to evaporate so the squash and apples aren't mushy).

Bake at 400 degrees for 30 to 40 minutes or until the edges of the apples and squash start to brown. Let cool for 5-10 minutes before dishing out of the pans.

*I've been doing more research on pork and some studies show that pork can be bad for you if not prepared by traditional/old fashioned curing or smoking methods (sometimes labeled as "uncured"). Stay tuned for my complete post on the topic of pork.

** Rub the rosemary between your fingers to break it apart a little before adding to the rest of the ingrediants. Fresh rosemary would probably be the very best, but it's expensive so I don't use it as much as I'd like. If you have it available I would add about 2 tablespoons chopped fresh rosemary.

Preparation time: 25 minutes. Bake time: 30-40 minutes.
Servings: 4-8 (depending on the size of the squash).